Blower motor replacement - 1984 Volvo 244 DL
July 26, 2003 Note: The
replacement of the blower pictured below was done two years and 40K miles
ago. It was a nice day to work and documenting it was fun. The 1984
has 322K miles today. I have five other 240 series volvos, so I fully
expect to be replacing another blower in the future. When I do, I will
try the steps listed in Don Foster’s “Chainsaw
Method” Be sure to consider this alternate approach if you
are looking forward (or not looking forward) to replacing your blower motor.
July 2005: 350K and four
years; no trouble yet. Up to eight 240s now, and still no need to replace
any more blowers, although I did replace one in a 91, as a “as long as
you’re in there” preventive gesture, while changing its leaky
heater core. Meanwhile I’m adding just a few notes to the
text below.
July 2006, June 2009, August 2011, April 2019:
More new links added at bottom of page.
July 2011:
Replaced one in a 1990. So far I haven't found the right car to chainsaw,
so this one was done like the last, except instead of taking a chair out,
I removed the dash. It is now organized into two separate pictorials; dash and fan:
1990 Dash Removal and Replacement
1990 Blower Motor Replacement (with dash out)
Art Benstein
Here’s the blower motor page:
1. Remove driver's seat. 13 mm wrench. This is easy to do
and repays you in body comfort through the hours to come.
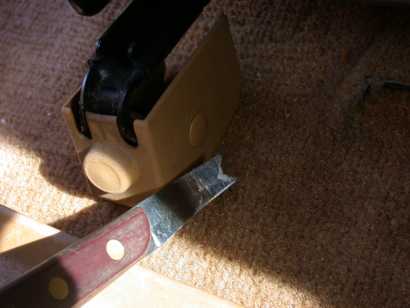
I use this re-ground kitchen knife to get under and
pry up trim fasteners.
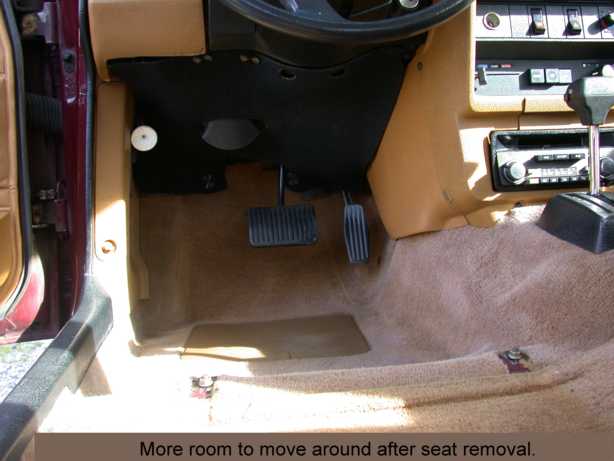
Note: You may prefer to
leave the seat in place, but remove the dashboard. Much of the work made
more comfortable by removing the seat is accessible from the top, if the dash
is removed. Since the time I changed this blower motor, I’ve
removed a number of 240 dashes, both 81-89 and 90-93 style, mostly under
pressure of closing time at the junkyard, so I know it can be done in twenty minutes. For additional on dash
removal, see the links at the bottom of the page for photos of a heater core
replacement and manual pages showing drawings of the dash mounting.
2. Remove knee covers, console side panels, glove box and radio. Separate console front. Phillips and standard screwdrivers.

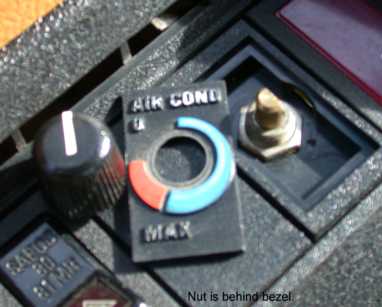
3. Pull off the A/C control knob. Remove the control; its
retaining nut is under the snap-in bezel. Disconnect the remaining wiring
and set aside the console front. Sharp pick and
needle-nosed pliers.
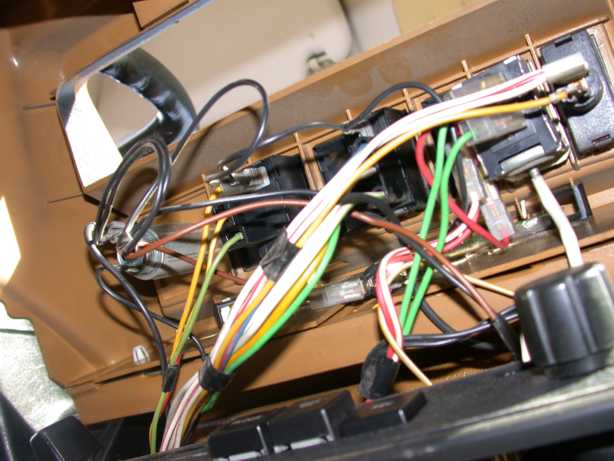
4. Detach console front frame at corners. Make note of
ground wire connections. Remove heater control panel from console front frame
and set aside frame. Phillips screwdriver.
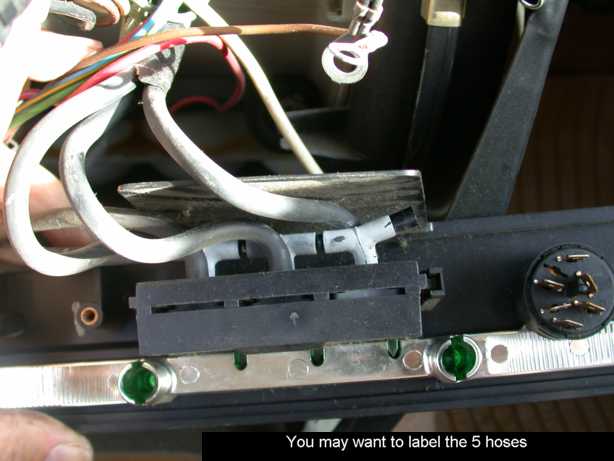
5. This step is optional, meaning you could continue with the motor replacement and work around the heater controls without too much difficulty. Disconnect the harness from the blower control switch and remove the cable operated heat control. Identify and remove the vent vacuum hoses from the vent control pushbutton assembly and set aside the heater control panel. The hoses on my car had silk-screened numbers, but they were difficult to see, so I tagged them with tape.
6. Remove the console side braces. 12mm and Phillips screwdriver.

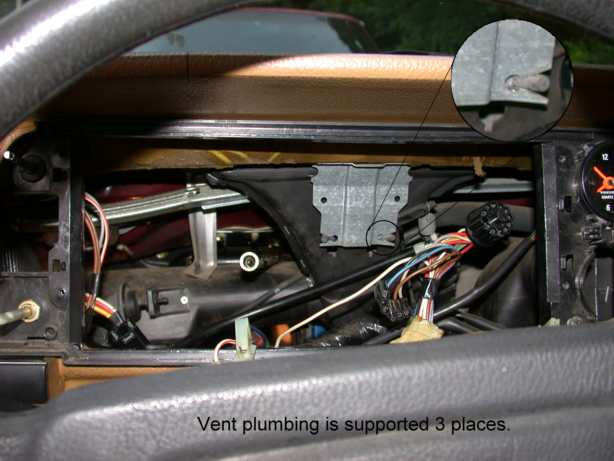
7. Remove right side vent distribution: 2 hose connections to the actuators, 2 Phillips screws, and 3 rubber support hangers.
8. Remove center vent and distribution plumbing. Notice this piece is not symmetrical.
9. Remove steering column cover. Remove instrument cluster. Phillips screwdriver.
10. Remove left side vent distribution. Like right side, but I was not able to get it in or out of the dash without separating the pieces piping the defroster, side and foot vents.
By now, you need to stretch, so come back to the passenger side:
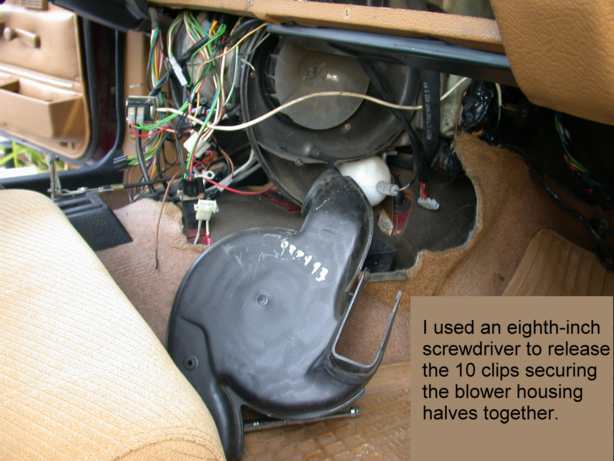
11. Remove the 10 clips holding the blower housing halves together on the right side. As you've made plenty room for yourself, you can use two hands -- one to pry the clip loose and the other to keep it from flying away.
12. Remove the impeller. The clip needs to slide over the lip cast into the impeller, which means you need to pry one end up while pushing the other end toward the shaft. The shaft has a groove cut into each side. I used the hooked end of a mechanic's pick to remove the clip in one easy motion.
Note: Don’t
interchange the left and right impeller blades. Whoever did that one and
put this all back together wasn’t very happy.
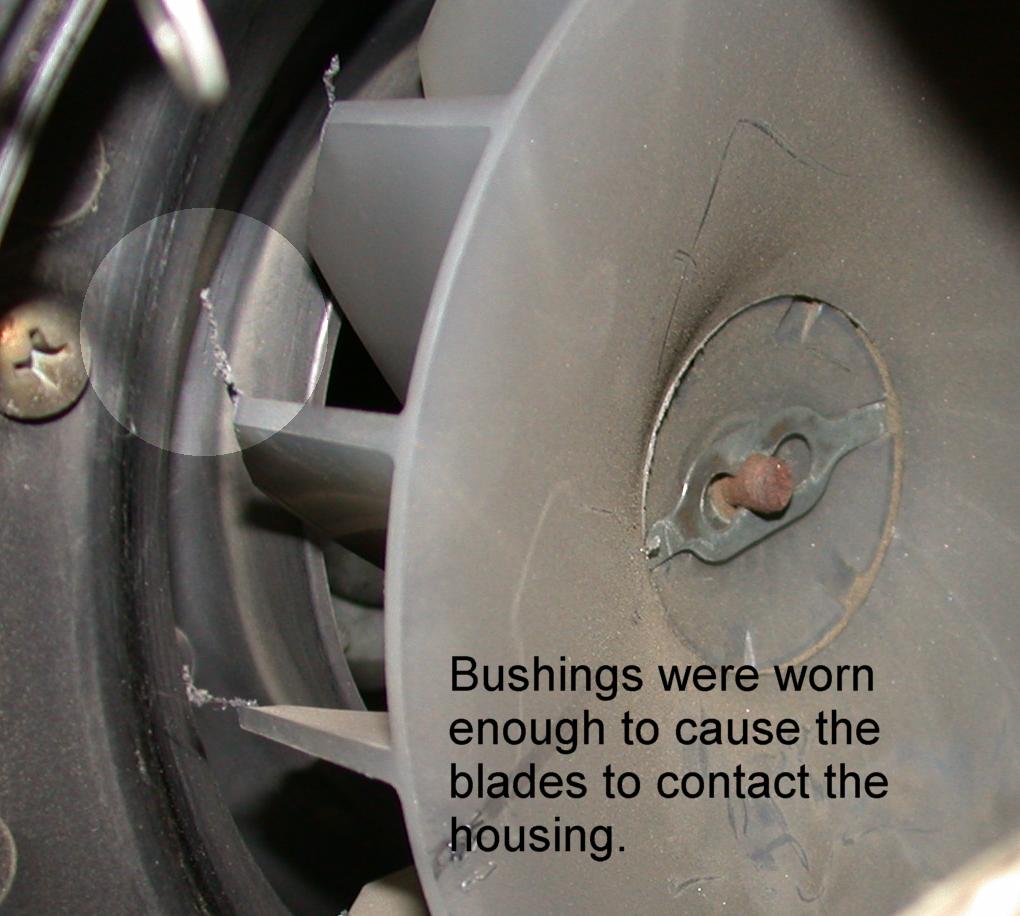
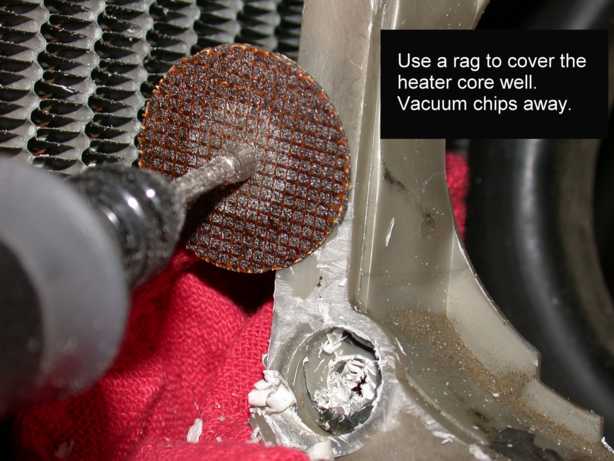
As you can see, the shaft of my 18 year old blower motor is rusty. I needed to remove the rust with emery cloth before sliding the impeller off.
13. Remove the left blower housing outer half (10 clips again). Remove the impeller. Remove the inner half. (3 Phillips, 1 hose)
14. Clip ground wire to motor (unless you can reach its ground screw!) and disconnect power lead. Remove the motor (3 Phillips).
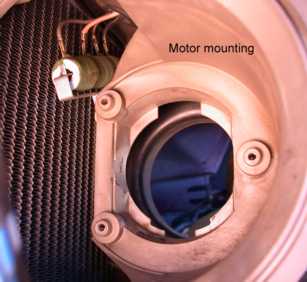
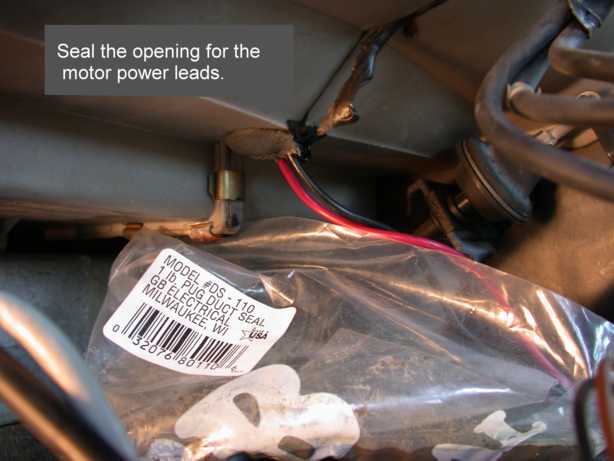
Note: You can see the resistor in the photo above left. If your old motor burned up, or you have any other reason to suspect the resistor and switch, now would be the time to have the kit on hand. I believe it is available aftermarket, but have no personal experience with it. The plug is too large to fit though the un-split combination unit wiring hole, so the pins must be removed from the connector housing to fit it through without altering the housing.
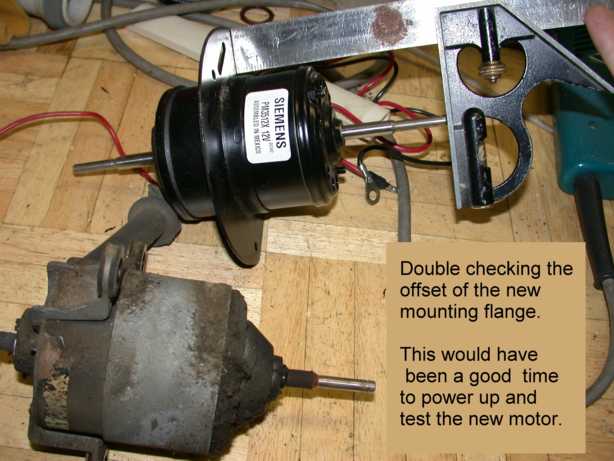
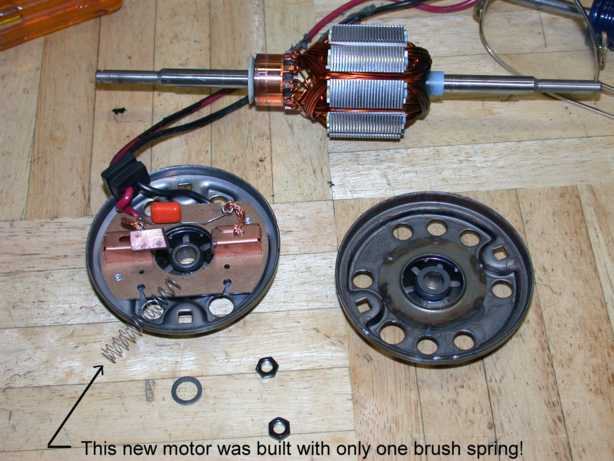
15. Compare your new motor with the old.
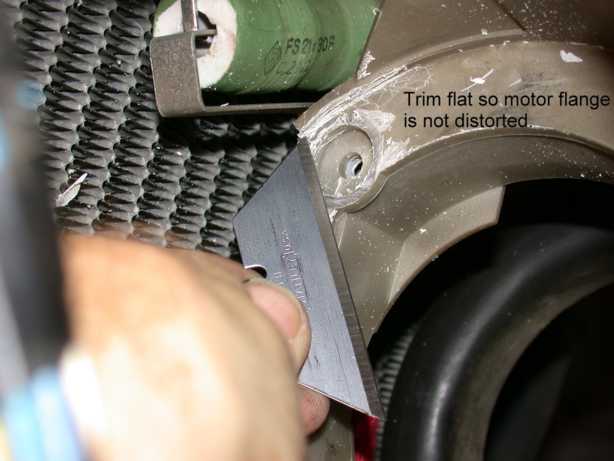
The instructions packed with my Siemens replacement part called for grinding off the mounting bosses that formed the supports for the shock mounting of the original equipment. This instruction was specific to 1981 through 1984 model years.
A Dremel tool makes short work of the grinding. The bosses are hollow. A left-handed individual could have done this better and faster than I did.
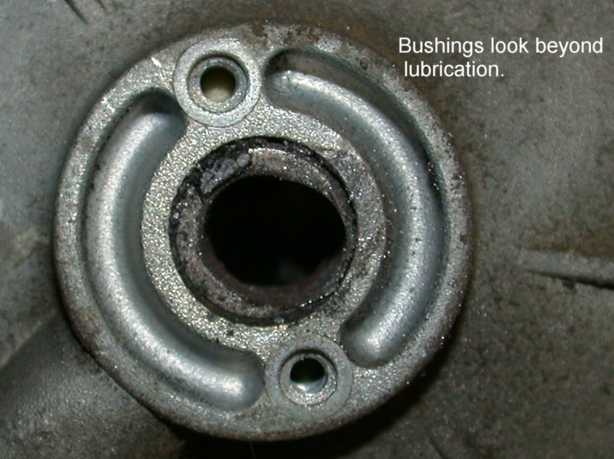
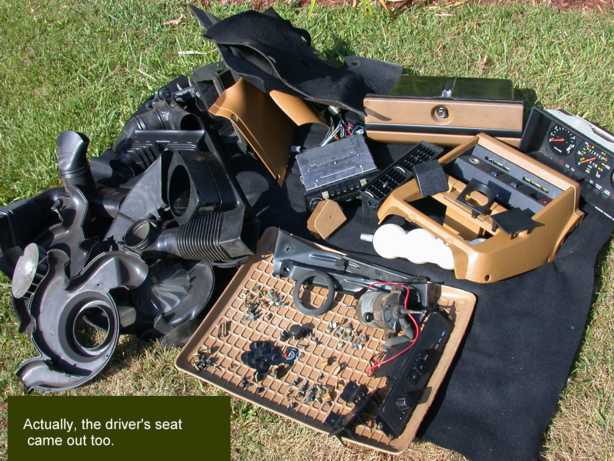
By now you have a yardsale pile of parts removed, so it is well you clean and repair anything else in the vicinity, such as the resistor and switch, if your motor burned up. I took the opportunity to clean the vent plumbing, clean leaves from the recirculate flap and adjust the cable on the heater control.
16. Assemble the motor in the blower housing and connect the ground wire to a solid ground point. I used the bolt attaching the heater box support bracket to the transmission hump.
17. Because of my peculiar experience, I would advise testing the operation of the motor before going too much further. At the very least, test it for noise and balance with the left inner housing and both impellers installed.
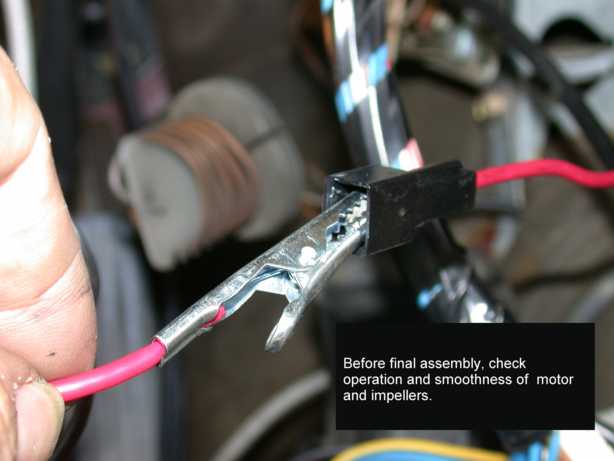
The replacement motor did not turn. Removed to the bench, it would jerk and try to run if jarred. Turned out, only one of the brushes had a spring behind it. With luck, I found a substitute in the junk collection I maintain.
Note: In four years I’ve not once heard of anyone else receiving a Siemens motor with this or any other specifically documented manufacturing defect.
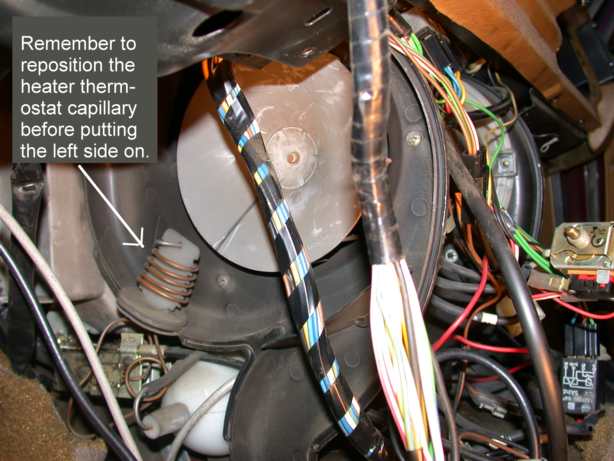
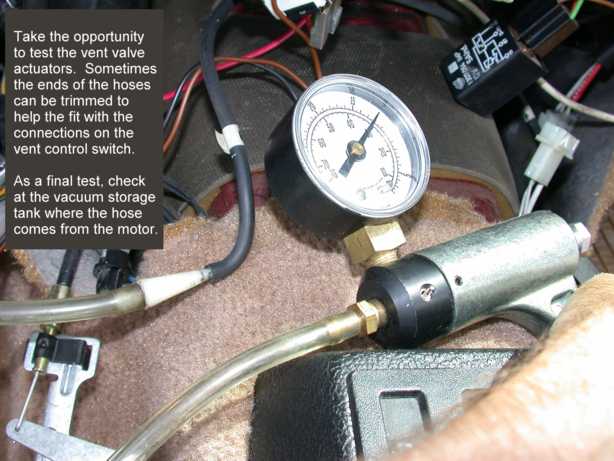
18. Begin reassembly in reverse. Check each vent valve flap as you put the blower housings back together -- they can easily be assembled past their stops, rendering them inoperable. As a test of leakage and operation, I used a vacuum tester to check each actuator.
November
2005: Here are some links to pictorials with 240 Volvo relevancy.
240 Volvo AC R-134a Conversion
Volvo
240 Heater Core Replacement
Comparing Hepu and GMB Coolant Pumps
Third
Seat for Wagon - Volvo's installation instructions
Notes on
Electronic Speedometer
Notes on
Volvo Breakerless Ignition
Bosch K-jet Lambda Controllers
Main Fuse for Engine Management Systems
Replace Speedometer Pinion Seal
Some Notes on Door Handle Repair
The 240 Headlight Switch Before 1986
Attempt
to Improve the Lighting in the Small Clock
A Few Uncaptioned and Wet
Pix of a Reman ATe Rear Caliper
Notes on 240 Volvo Ball Joint Failure
Automatic
OD Solenoid Diagnosis in Pictures
Notes on
Automatic OD Solenoid Failure Analysis - (not repair instruction)
Volvo
240 Windscreen Wiper Notes
Using the K-jet Fuel Pressure Test Kit
Notes on the Temp Faker - Or That Temp Comp
Board
Tony's Pages: Seat Repair and More
Joe HC's Rear
Main Seal and AW-70 Kickdown Cable Replacement
940 Related:
Notes on Replacing a Regina Fuel Pump and
Why
Notes on 740/940 Speedometers (Yazaki) 1991-1994
External Links:
Homebrew TAB tool (Neil Wilcer's)
Thanks for looking. Email
welcome: benstein at cleanflametrap.com